I know it has been awhile, but I thought I'd post a few photos for an update. The first two are of the 6x8 Greenhouse from Harbor Freight. It wasn't real expensive and it looks like it will hold up nicely. I'm planning on trying some spinach, kale, lettuce and some greens for the chickens in it! In the spring it will serve as a place to start seeds.
The next photos are of my dad's 1946 Farmall tractor. We used it to gather pumpkins and squash recently. It is also a pretty cool antique!
Here are a couple pictures of the chicks! They're not chicks anymore...they're getting big! Still won't be laying any eggs until around the end of November. Here they are! The close-up is of one of the Welsummers that I thought was going to peck at the camera. In the other photo, they're all just staring at what I'm doing.
I'll do another post, when I plant some seeds out in the greenhouse! Thanks again for reading!
Sunday, September 30, 2012
Wednesday, August 22, 2012
New Chicken Photos!
We've been doing some "remodeling" of our old chicken house over the summer. We moved them into their new and much larger house a few weeks ago! Here are some photos of both the chicken house (I'm planning on painting it soon), their outside area and also some photos of the chicks! They're not really babies anymore, but are still too young to lay eggs. Here they are.
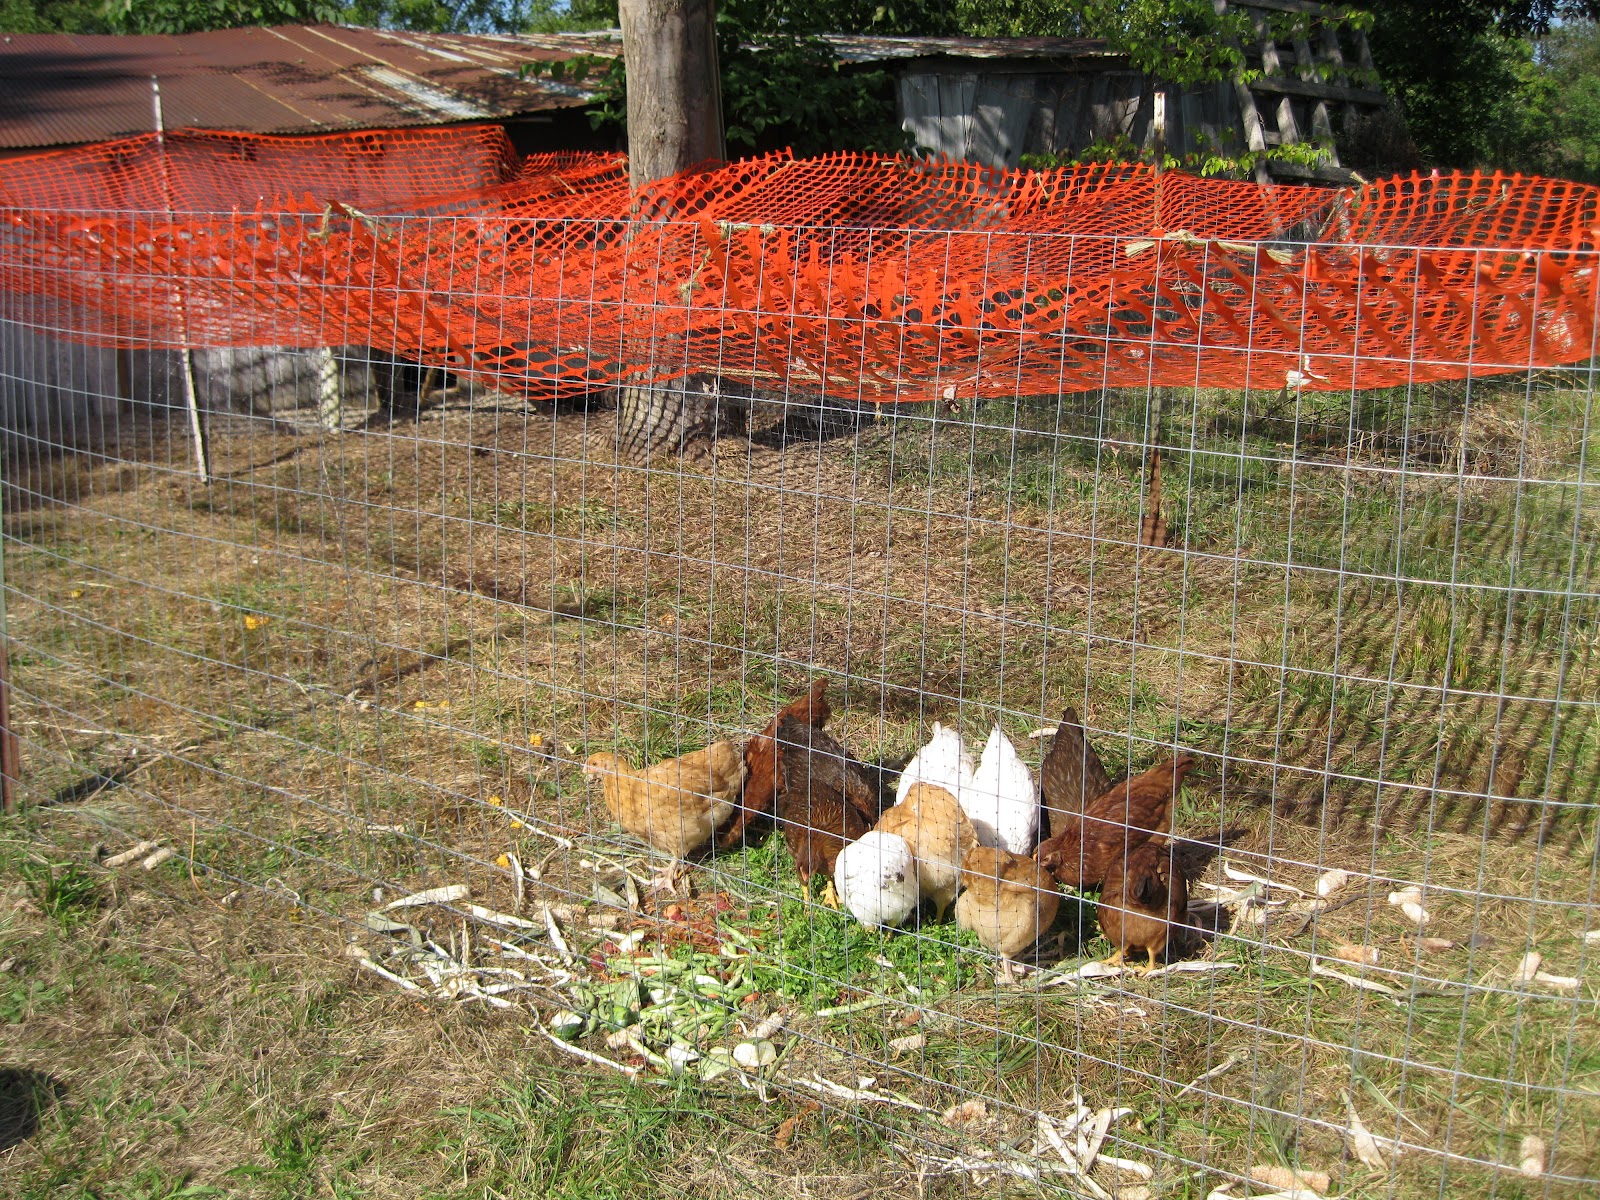
They're eating scraps from the stew vegetables and peaches I canned earlier today.
The orange mesh fencing on the top, is to keep the hawks out.
I have 3 of each breed of hen. This one below is a Delaware. They are very bossy chickens.
When you go into the chicken house there is a separate door to their pen. That large bottle in the back is a waterer I got for $10! They sell for $50. It pays to look around for used equipment.
I went inside to take this one, they were all waiting for me to throw food for them.
My dad and I took apart an old wooden ladder to make two roosts for them. They all pile on these at night and sleep.
This one is a Buff Orpington and they are very tame.
Another bossy chicken looking to see what I'm doing...and trying to peck at the camera.
More curiosity about what I'm doing.
This chicken house was brought to our house over 30 years ago....it was at my grandparents before for who knows how long. I'm going to be painting it up soon, and adding some decorations. The chickens won't care though.
They're eating scraps from the stew vegetables and peaches I canned earlier today.
The orange mesh fencing on the top, is to keep the hawks out.
I have 3 of each breed of hen. This one below is a Delaware. They are very bossy chickens.
When you go into the chicken house there is a separate door to their pen. That large bottle in the back is a waterer I got for $10! They sell for $50. It pays to look around for used equipment.
I went inside to take this one, they were all waiting for me to throw food for them.
My dad and I took apart an old wooden ladder to make two roosts for them. They all pile on these at night and sleep.
This one is a Buff Orpington and they are very tame.
Another bossy chicken looking to see what I'm doing...and trying to peck at the camera.
More curiosity about what I'm doing.
This chicken house was brought to our house over 30 years ago....it was at my grandparents before for who knows how long. I'm going to be painting it up soon, and adding some decorations. The chickens won't care though.
Saturday, July 7, 2012
Farmer's Market
Here are some photos from the Farmer's Market here in Mt. Vernon. This is my first year so I'm learning a lot. Check out the pics! This was right when we set up. We took zucchini, swiss chard, collard greens, green onions, turnips and beets. The photo where you can see radishes was from a different day of picking. I just thought I would include it.
Wednesday, June 27, 2012
Baby Chicks Are Here!
I ordered 12 day old baby chickens from a hatchery a couple of months ago and they've finally arrived! I got 3 Welsummers, 3 Buff Orpingtons, 3 Rhode Island Reds, and 3 Delawares. I ordered all hens. There is a 90% chance of the hatchery having sexed them correctly. So I could end up with a rooster in the mix. They're currently in a cardboard box with a clip light to keep them warm. During the first week the temperature in the box must be kept at 95 degrees. You decrease 5 degrees each week. So far they're all eating and drinking just fine. Although when chicks are only a few days old they're extremely fragile and many times not all of them live. So far, so good here! Below are a few photos! I'll try to take photos each week so you can see how fast they grow!
Friday, June 22, 2012
More Garden Photos
Here are a few more garden photos. First one is Potatoes.
UPDATE: The baby chicks will be here between the 26th and 28th of June depending on when they hatch!!
Carrots
Corn
Giant Chard
Watermelon
Pie Pumpkins
UPDATE: The baby chicks will be here between the 26th and 28th of June depending on when they hatch!!
Tuesday, June 19, 2012
Garden Photos June 2012
Here are a few photos of the garden. There are actually 4 separate plots. Here is what we'll call the "corn plot". I have sweet corn, Indian corn, cucumbers, gourds, watermelon, pumpkins and a variety of winter squash planted back here.
The next 2 photos are of the next plot. I have Swiss Chard, Kale, Collard Greens, Tomatoes, Potatoes, Sunflowers, Peppers, Carrots, Radishes, Turnips, Beets, Butternut Squash and 1 watermelon that came up on its own!
The next plot is the lower garden plot. This plot has onions, kale, and several rows of green beans. This is also where all of the lettuce came up on its own.
The fourth plot is the Zucchini garden. This plot has Yellow Squash, Patty Pan Squash, Zucchini, onions, a few tomatoes and a couple of extra cucumbers. We planted things in several locations to determine which space worked best for each vegetable.
The next 2 photos are of the next plot. I have Swiss Chard, Kale, Collard Greens, Tomatoes, Potatoes, Sunflowers, Peppers, Carrots, Radishes, Turnips, Beets, Butternut Squash and 1 watermelon that came up on its own!
The next plot is the lower garden plot. This plot has onions, kale, and several rows of green beans. This is also where all of the lettuce came up on its own.
The fourth plot is the Zucchini garden. This plot has Yellow Squash, Patty Pan Squash, Zucchini, onions, a few tomatoes and a couple of extra cucumbers. We planted things in several locations to determine which space worked best for each vegetable.
Sunday, June 17, 2012
How to Make a Cheap Rain Barrel System
Here are some photos of my rain barrels. I have 3 55 gallon plastic food grade barrels that I got from a guy in the classifieds. I bought the barrels for $15 each. Most of the rain barrels you see already made start around $100 and go on up into the hundreds of dollars. You can search on Craigslist, newspaper and check into bottling companies. Often times they get syrup in large containers. I've also heard of people who have gotten olive and pickle barrels. In order to make these, we used a variety of PVC and ABS fittings. Its really simple to just piece together something out of a bunch of parts. We connected all of them at the top, so that when the first barrel fills it overflows into the next and so forth. We put plastic hose bibb valves at the bottom of each of the barrels so we could get water from any of them. If you do not put a valve on each, then you'll need to have the barrels set up on a higher platform, the next one being lower and the last one being even lower. This is so gravity will make the water flow out. Below are the pictures! Thats my dad filling up a watering can.
Subscribe to:
Posts (Atom)